Chic Candlesticks
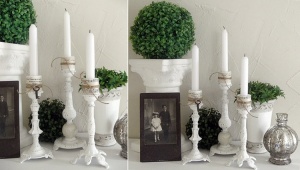
Shabby Chic Inspired Blog has shown us a great way to display our candles. Simply plan a visit to your local flea market, grab some old lamp bases, give them a nice coat of paint and your candlesticks are ready.
Picture or Card Holders
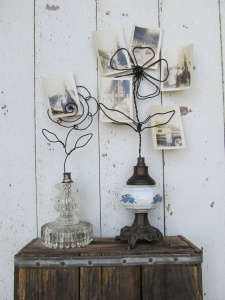
Sassy Trash Blog has shared a wonderful picture and card holder idea. If you happen to have an old lamp base, connect flowers made of thick metal wires to it and some really unique picture or card holder will be ready to be displayed in any part of your home where needed.
Lamp Base Birdbaths
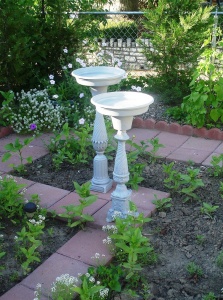
Image via: jaznak at flickr
A Tall Garden Planter
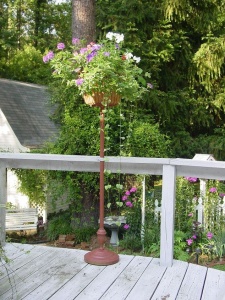
Pat aka Queen of Thrift via Home Talk has shared a project made from an old base of a floor lamp. She has simply topped an old floor lamp post with a basket of planter and the result is truly fabulous.
A Memo Chalkboard
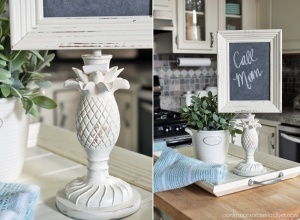
Christy K. James at Confessions of a Serial DIYer combined a pineapple shaped lamp base with a picture frame painted with chalkboard paint and now it serves as a wonderful memo chalkboard in her kitchen.
A Side Table
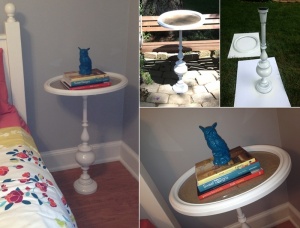
Stephanie Smith at Madeline Lewis Designs has combined a burlap lined old painted picture frame with a painted recycled lamp base and a wonderful table got created that looks just so beautiful in her room.
A Table Fan Base
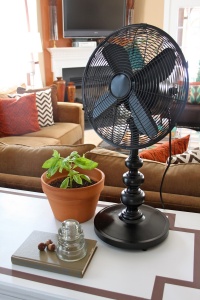
Bethany DeVore at Dwellings by Devore has given a makeover to a fan. She has combined a fan that had its base missing with a lamp base and now it serves as a perfect table fan.
A Framed Birdcage
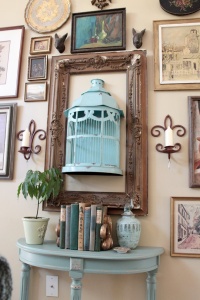
Rhoda at Southern Hospitality Blog has used a birdcage in a way probably no one could think of. She has used half of a birdcage painted aqua and has framed it to become the part of the gallery wall display in her living room.
A Storage for Books
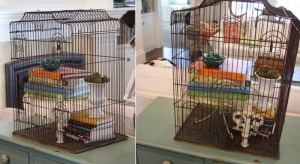
The Pleated Poppy has a wonderful idea for book worms who have already lined a wall or two with bookcases and still need a storage solution. Simply find a big birdcage that has enough space to store at least 10 to 15 books.
A Birdcage Planter
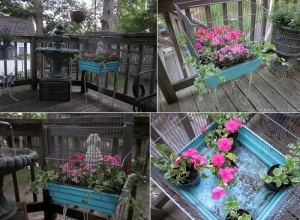
Donna at An Enchanted Cottage has shared a lovely way to upcycle an old birdcage. Let an old birdcage give a home to another life though not a bird but plants still live and grow and will make you happy when you will see them.
An Easter Egg Display
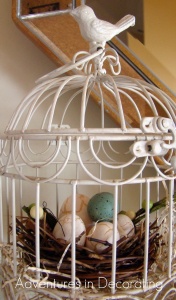
Image via: Adventures in Decorating
A Whimsical Lamp
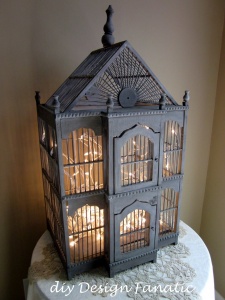
Pam at DIY Design Fanatic has created a whimsical lamp using an old birdcage. She spray painted the birdcage and then added a string of lights to it and the result is in front of you.
A Desk Organizer
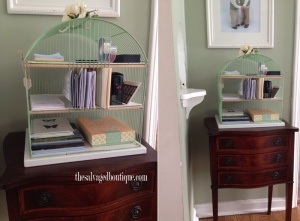
Karen at The Salvaged Boutique found an old birdcage and she knew she had to convert it into a beauteous desk organizer. She painted the birdcage in a wonderful shade of green and then added dowels and plywood boards to become the shelving. Absolutely marvelous work Karen!
A Candle and Greenery Display Inside a Birdcage
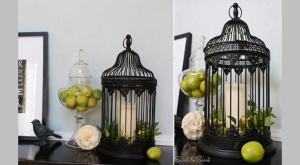
Image via: Sand and Sisal Blog
A Table Lamp
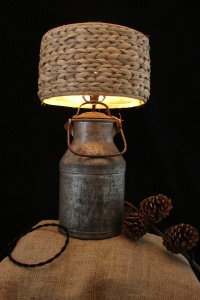
Etsy Shop Benclif Designs has amazingly rethinked an old milk can into a table lamp. The milk can is serving as the lamp base and for the lampshade they have used woven sea grass. This lamp is ideal for adding a touch of farmhouse feel to your home.
A House Number Display
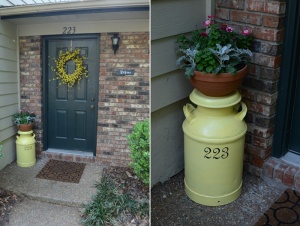
Tamara at The Jolly James has given a nice coat of spray paint to an old and ugly milk can and then she has added a vinyl sticker for the house number. To make it even more exciting she has topped the milk can with a planter. Her front porch looks simply gorgeous with this milk can house number display. Two thumbs up Tamara!
A Cute Snowman
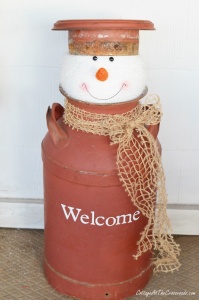
Though winter will bid adieu in a short time you can still relive this season of snow by making a snowman. Jane Windham of Cottage at the Crossroads has turned a milk can into a cute snowman. The interesting thing about this snowman is that it is painted red with the head of snowman coming out between the red milk can and the red lid cap. As if the snowman is dressed in a red jacket. 🙂
A Painted Milk Can Planter with a Motif
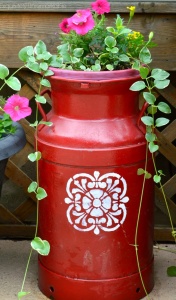
Image via: Exquisitely Unremarkable
A Garden Fountain / Birdbath
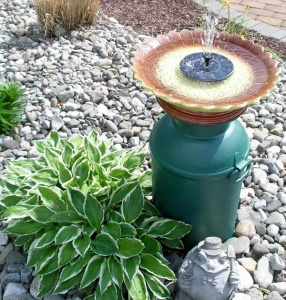
Image via: Home Talk
A Vase in The Kitchen
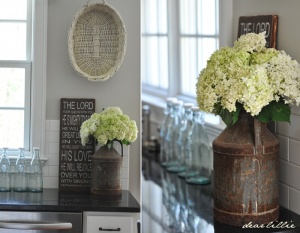
Jennifer at Dear Lillie Blog has shared the pictorial tour of her parent’s kitchen and one interesting element of this kitchen is the old milk can employed as a vase.
A Patio Side Table
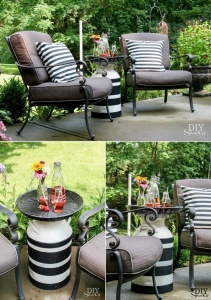
Image via: DIY Showoff
Cute Pin Cushions
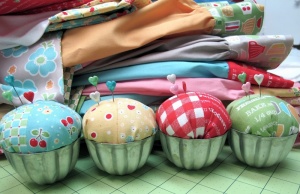
Lori Holt at Bee In My Bonnet has re-thinked four old jello molds into cute pincushions using lovely prints of fabric. A pin cushion like this can be a great addition to your sewing room or table.
Jello Mold Toadstools
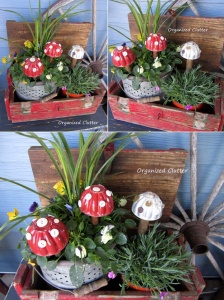
Organized Clutter has shared a super cute way to recycle jello molds. Simply paint them in red color and hot glue white buttons over them to make toadstool mushrooms. You can make the stems of the mushrooms using dowels or any woody thing like screwdriver handles.
A Tea Light Holder
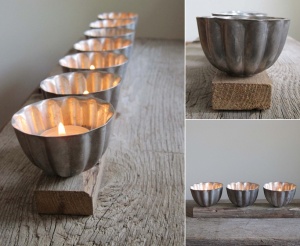
Etsy Shop Cattales has created a spectacular tea light holder by fixing vintage jello molds on a slab of wood.
Adorable Easter Baskets
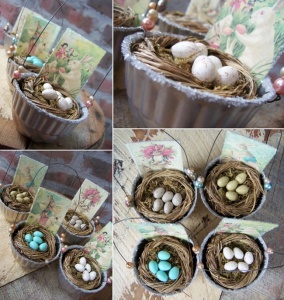
Cattales at Etsy has shared a way to decorate your home for this coming Easter. You can make holes in old jello mold for adding wire handles. Fill them with faux nests and eggs. for even more beauty you can add beads to the wires and you can dip the edges of the jello mold in glitter glue.
Lovely Wind Chimes
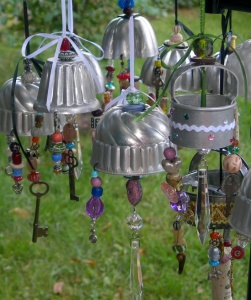
If you need a wind chime idea then think about any jello molds you may have. According to Etsy Shop Wdswmn you can make some really fun wind chimes or mini chandeliers by attaching beads and crystals to vintage jello molds.
A Spring Garland
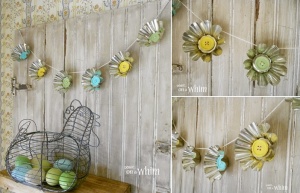
Denise Stain at Denise on a Whim has crafted a spring garland with mini jello molds, colorful buttons and twine. Spring is inching closer and this is good decor project you can give a shot to.
Tiered Storage Trays
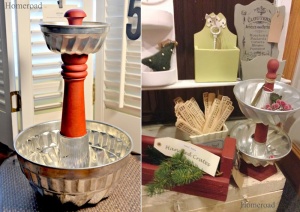
Image via: Home Road
A Garden Flower
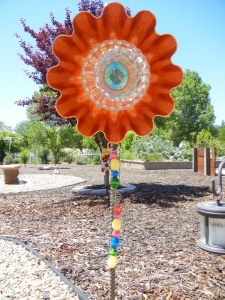
Beachy Art at Etsy has created a fantastic garden flower accent from a copper jello mold, shot glasses and beads.
A Fall Centerpiece
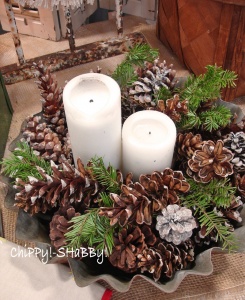
Image via: Chippy Shabby
A Light Garland
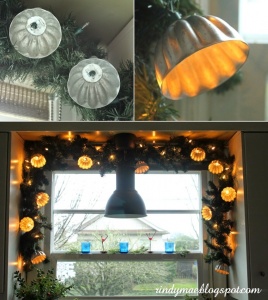
Mindy at Rindy Mae found some jello molds and an idea popped in her mind. She with the help of her father drilled holes in the molds and fixed them on a string of lights. Then she intertwined the string of jello mold lights around a faux garland and the result is in front of you.
Lace Doily Bowls
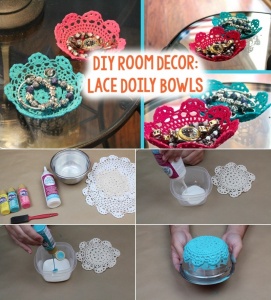
Tanner Bell at A Little Craft in Your Day has shared a wonderful way to create lace bowls using doilies. All you need to do is to take a mixture of fabric stiffener and acrylic paints in a bowl, dip the doily in it and then put it over an inverted bowl. Let the doily rest there for about 24 hours and a beautiful cute little bowl will be ready.
A Table Runner Made from Dyed Doilies
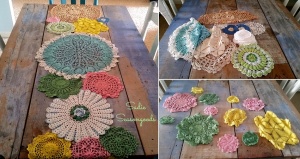
Image via: Sadie Seasongoods
Bohemian Dream Catchers
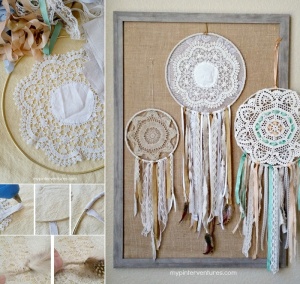
Image via: My Pinterventures
Framed Doilies Wall Art
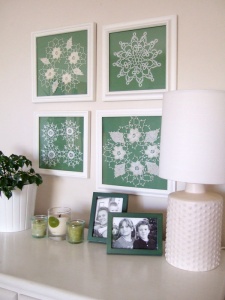
Crafty Nest has shared a beauteous wall art idea. All you need to do is to frame some old lace doilies against the backdrop of some colored construction paper.
Doily Decorated Mason Jars
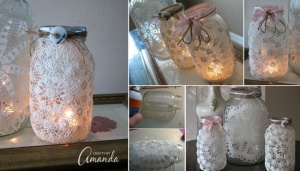
Image via: Crafts by Amanda , The Whoot
Bulletin Board Pockets
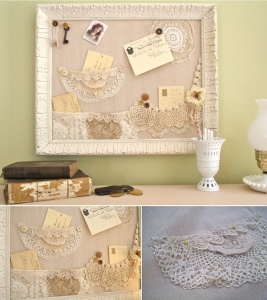
The Polka Dot Closet Blog has a bulletin board idea for shabby chic decor lovers. If you need some pockets for your bulletin board then look around for doilies and turn them into pockets.
Doily Hot Air Balloons
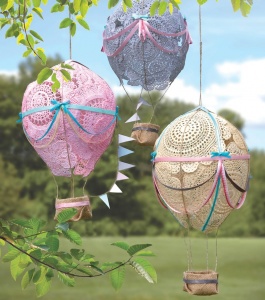
Image via: Joann
An Earring Holder
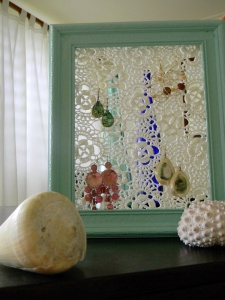
If your earrings usually remain stashed in a box and you usually have to do a search to find the ones you want to wear, then this idea by Etsy Shop Sunkissed Cottage is the one you should go for. It is an earring holder made by attaching vintage doilies to a vintage wooden picture frame.
A Doily Lampshade
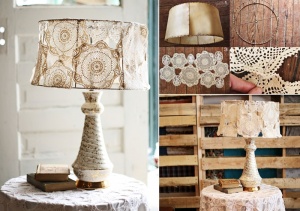
Image via: A Beautiful Mess
A Doily Window Valance
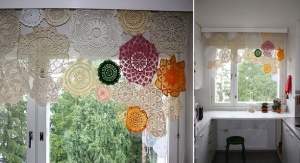
Image via: Hupsistarallaa
A Table Cloth Makeover
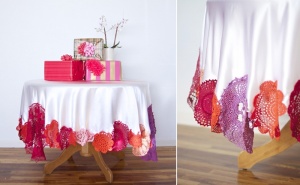
Victoria of A Subtle Revelry has shared a tutorial of giving a makeover to a plain white tablecloth. Simply sew colored doilies along its edges and the result will be like the one shown above.
A Doily Dress
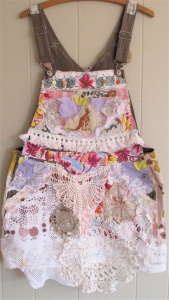
Doilies are great to refashion clothes too. Like this dress by Etsy Shop My Bonny looks so cool. You can also refashion your jeans or a shirt with doilies.
Doily Cushion Covers Makeover
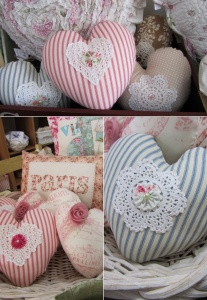
If you find your cushion covers too boring and simple then follow this idea by Lilly Cottage. Give all your cushion covers a whole new look by stitching or gluing doilies over them.
A Magnetic Board
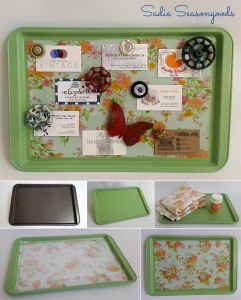
Sarah at Sadie Seasongoods painted an old cookie sheet in a lovely green color. After that she mod podged a fabric inside the tray and then turned it into a cool printed memo board with a green border. It can be great for your home office or your kids’ homework station.
A Serving Tray
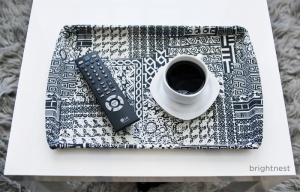
Kara at Bright Nest sprayed an old cookie sheet with spray adhesive and then skillfully covered the whole tray with fabric.
A Magnetic Glitter Glue Storage
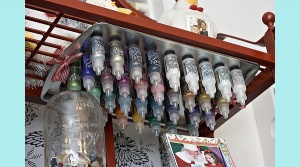
Image via: Be Organized
A Cookie Sheet Calendar
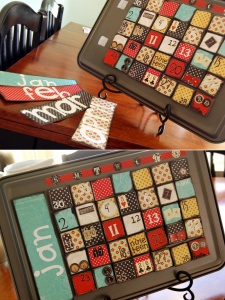
Autie at iCandy Handmade has created this super creative calendar using pieces of chipboard, printed paper, mod podge and velcro on a cookie sheet. The result of her creative mind is simply superb and an idea worth stealing.
A Shoe Storage Tray
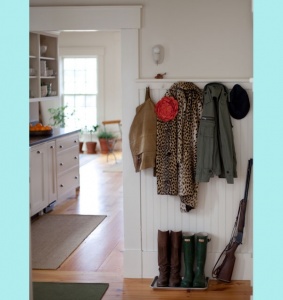
If the journey of your cookie sheet has ended in your kitchen then you can give it a great second chance to live once more. According to Apartment Therapy you can use that tray to organize two or more pairs of shoes that you often wear while going out. In this manner you can organize your entryway with a cookie tray instead of tossing it away.
A Tray Cork Board
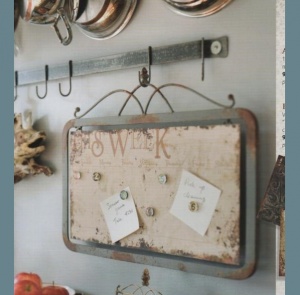
Image via: I’m Gonna DIY
A Cookie Sheet Chalkboard
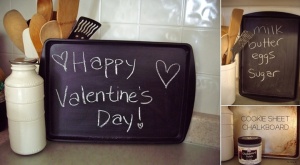
The Fancy Life has shared a wonderful way to utilize an old cookie sheet. Simply give it two or more coats of chalkboard paint, let it dry completely for two to three days and then place it in your kitchen to write different messages everyday that will put a smile on the faces of your family members.
Table Leg Lamps

Terry Moore of Forever Decorating had two old and ugly legs of a table. She gave them coats of paint and then gave them a distressed look. After that she drilled holes in the legs with a long drill, added wiring and installed the lamp parts and the shade. And the result is in front of you; two glorious lamps are perching on small tables in her living room.
Mason Jar Lantern Holders
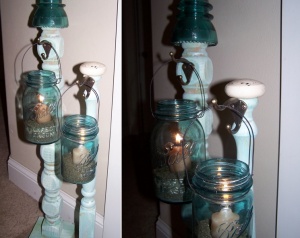
Becky of Beyond The Picket Fence recycled two table legs by attaching hooks to them to hang some really beautiful mason jar lanterns. These mason jars are very special for Becky as they remind her of her beloved son named Mason who is no more in this world. Blessings to you Becky!
Cute Table Leg Bunnies
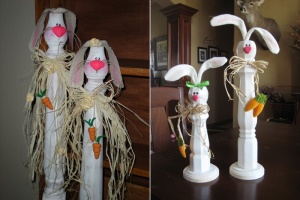
Image via: Sassy Sanctuary
A Colorful Candlestick
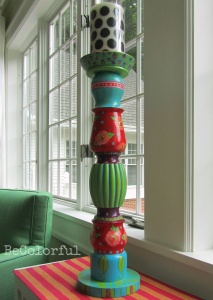
Be Colorful Blog has shared a kaleidoscopic way to re-use an old table leg. Paint its sections in different colors and patterns and a long and beautiful candlestick is ready to display your candle.
A Water Trough Sink with Old Table Legs
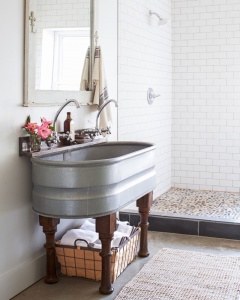
Country Living has shared a picture of a bathroom sink that is made by attaching four legs of an old table to a water trough.
Cool Chalkboard Stands
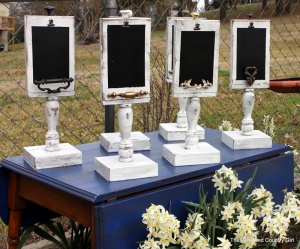
The Weekend Country Girl has shared a way to recycle old table legs into fun chalkboard stands. If luckily you have the top of the table available too, you can use it to make the chalkboard part of these stands.
A Foyer Table
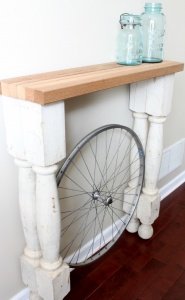
Image via: Reinvented
Lovely Wind Chimes
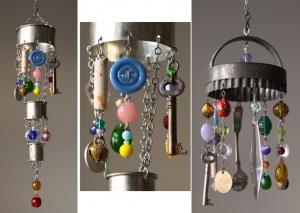
Blogesteix Chandeliers has recycled vintage cookie cutters into wind chimes by connecting bead chains and other things like old keys, salt spoon and buttons. You can also try making one like this and hang it in your room.
A Hook Rack
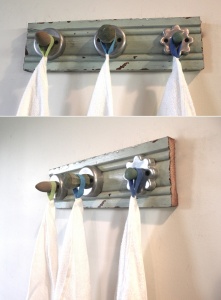
Etsy Shop Bluebird Heaven has shared a wonderful idea of recycling cookie cutters. Three cookie cutters are attached to a distressed wood board with nails and they have become a unique and creative hook rack where you can hang different things like kitchen clothes, towels, coats, jewelry and more.
Cookie Cutter and Button Flowers
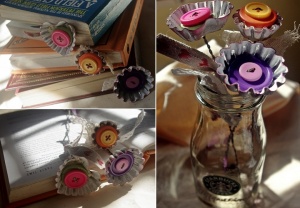
Shahrul Niza at Such Pretty Canvas has crafted these beautiful flowers using cookie cutters and buttons. To make the stems she used metal wire and mimicked the leaves using trims and tape. These flowers serve as amazingly cute bookmarks.
A Wall Art
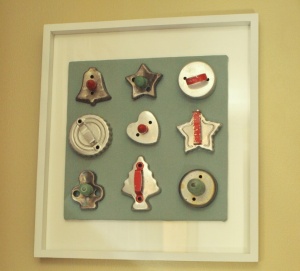
Image via: My Cup Runneth Over Blog
Cookie Cutter Night Lights
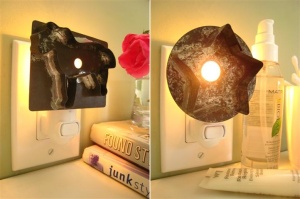
Image via: Ki Nassauer Style
A Mini Planter Holder
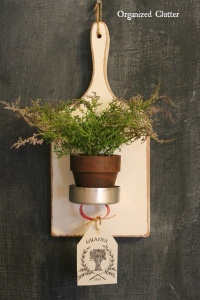
Organized Clutter has created this pretty planter holder for a mini terracotta pot by fixing a cookie cutter over an old cutting board. The cookie cutter serves as a perfect place for perching the mini clay pot planter.
Cute Pin Cushions
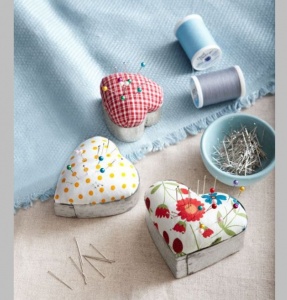
Country Living blog has presented an idea for those who sew regularly. If you are in need of a pin cushion then look around in your kitchen for one or more old cookie cutters and bring them into use with the help of styrofoam, fabric and glue. You can make these pin cushions for gifting to your friends too.
A Fabric Lined Storage Bin
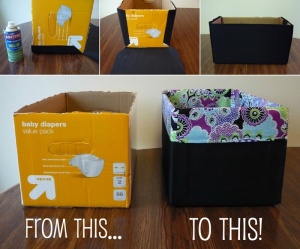
Mandy at Mandy’s Krafty Exploits came up with a brilliant idea to recycle a diaper box. She covered the diaper box with canvas fabric in black and lined the edges with a printed fabric. This fabric lined bin can be used to store a multitude of things.
A No Sew Fabric Wall Organizer
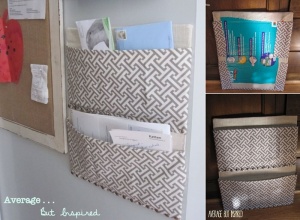
Bre at Average But Inspired has shared a clever way to upcycle a diaper box. She used a combination of different kinds of adhesives and glues and created this wonderful no sew wall organizer with storage pockets by covering a diaper box’s pieces in fabric.
Cute Toy Trucks
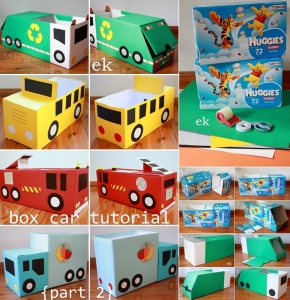
Image via: Keriene
A Tigger Toy Diaper Storage Shelf
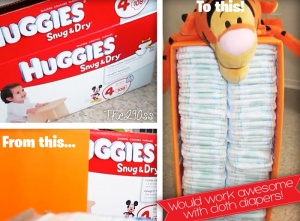
The 290ss Blog has shared a super cute way to make a diaper storage shelf from an old diaper box. You need to cover the box in a colored sheet matching a stuffed toy and then you have to hot glue the stuffed toy on top and voila!
A Shoe Cubby
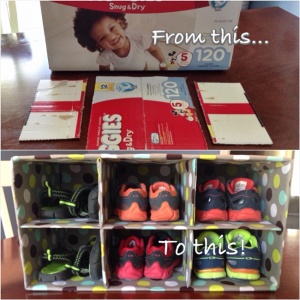
Sandy Britt via Pinterest has shared a fun way to recycle a diaper box and make a shoe cubby to store all those cute little pairs of shoes that must be lying on the floor of your child’s nursery.
Kids’ Book Storage
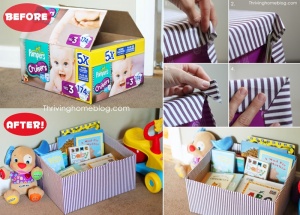
If your child has reached book reading age and you want a solution to store all the books in one place but can’t go for a big bookcase then this idea by Thriving Home Blog is worth giving a try to.
A Cute Dress Up Closet
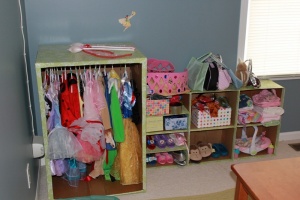
Image via: Craftin’ Texan
A Petal Wall Art
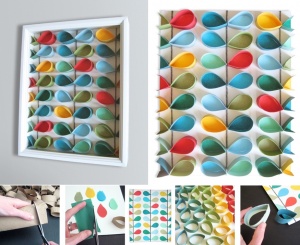
Mollee at Mollee Made has shared a stunning and colorful wall art she has created by making petals of sliced paper roll tubes and then painting and gluing them to a canvas that has colorful petals of colored paper already glued.
Log Favor Boxes
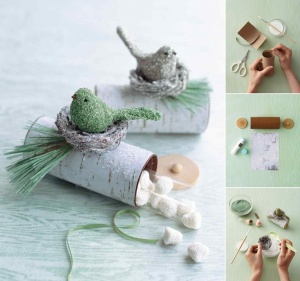
Image via: Martha Stewart
Paper Roll Tube Robots
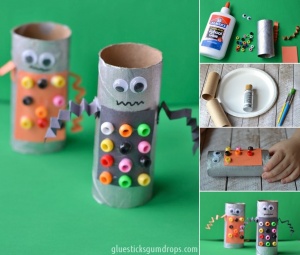
Donella Crigger at Glue Sticks Gumdrops has created these super cute robots with silver painted paper roll tubes, beads, construction paper and googly eyes.
A Cute And Colorful Train
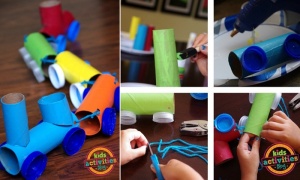
Image via: Kids Activities Blog
Adorable Owls
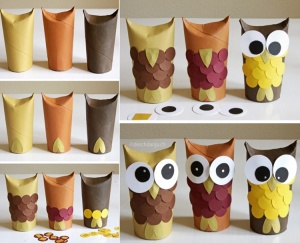
Topp Kreativ blog has shared a craft of making some really beautiful owls from empty paper roll tubes. All you need to do is to cover the paper roll tube in construction paper and then attach punched discs of colored paper to make feathers and eyes and cut a beak too from colored paper and voila!
Seed Starters
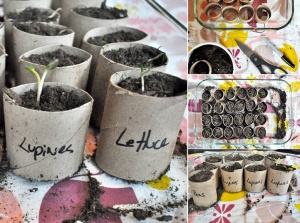
If you are about to grow plants in your garden and you need seed starter containers then this idea by We Know Stuff is worth giving a try.
A Faux Iron Grill Art
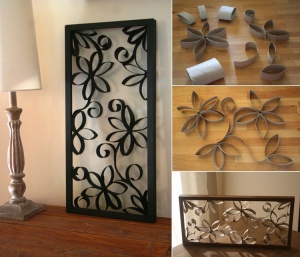
Image via: Croissant and Lavender
A Peanut Butter Bird Feeder
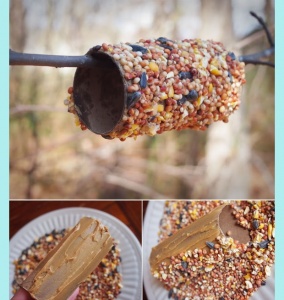
Image via: Go Grow Go
Fun Little Monsters
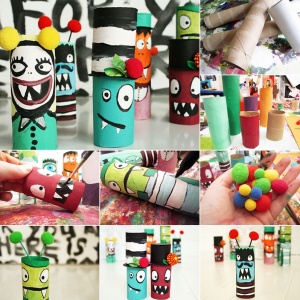
Image via: Alisa Burke
Paper Roll Tube Minions
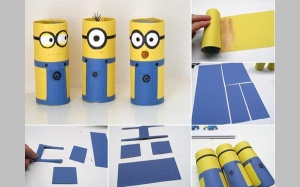
All Free Kids Crafts has created these minions by covering cardboard tubes in yellow construction paper and then made the overalls with blue construction paper. The eyes were created with white paper and a black marker.
A DIY Snowman Craft
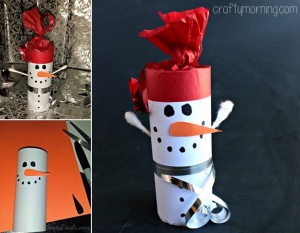
Image via: Crafty Morning
Yarn and Paper Roll Tube Bracelets for Kids
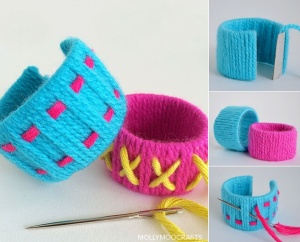
Image via: Molly Moo Crafts
Lovely Butterflies
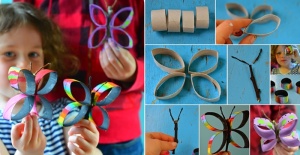
Maureen at Twig and Toadstool along with her kids has crafted these lovely butterflies that you can try crafting with the help of your kids for the coming spring.
Paper Roll Tube Binoculars
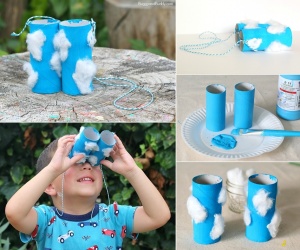
Image via: Buggy and Buddy
A Fun Marble Tubes Game
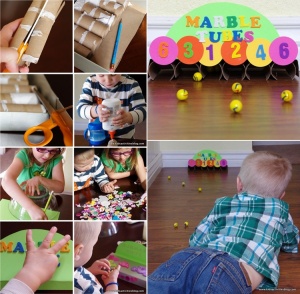
Image via: Kids Activities Blog
A Hello Kitty Craft Idea
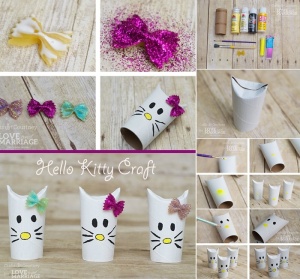
Courtney of Crafts by Courtney a guest at Love and Marriage Blog has shared a super cute tutorial of making hello kitties using painted paper rolls and glitter coated bow pasta. You can try making this craft with your kids as it is super easy to create and will surely be loved by your kids.
Ninja Turtles
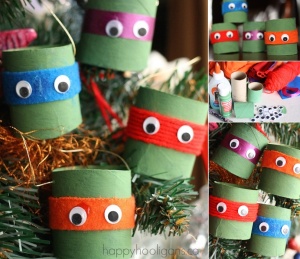
Image via: Happy Hooligans
Paper Roll Tube Turkeys
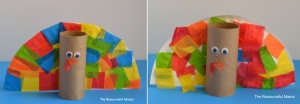
Image via: The Resourceful Mama
A Purple Octopus
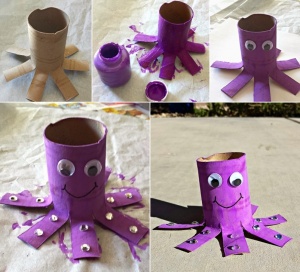
Image via: Crafty Morning
Mini Baskets Craft
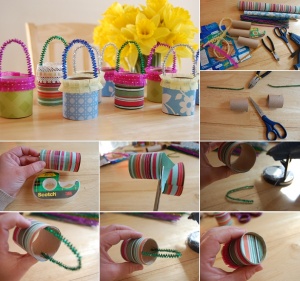
The Fab Miss B Blog has shared a tutorial for making mini decorative baskets using wrapping paper and paper roll tubes.
