Shoe Hangers
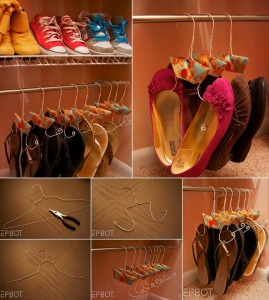
Jen at epbot has shared a great way to use old wire hangers, modify them and use them as hangers for your shoes that you can employ to organize your closet that seems to be upside down with the clutter of the shoes.
A Christmas Bauble Wreath
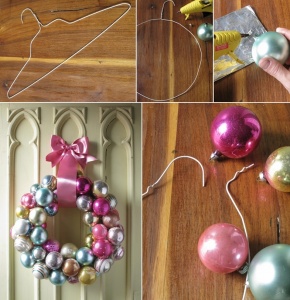
Eddie Ross has a wonderful idea to use a wire hanger as a frame to hold baubles in the form of a wreath. All you need to do is to modify and bend the hanger in the form of a circle and cover that circle with baubles using wires. The idea is pretty simple and the results are just amazing.
Kitchen Paper Holders
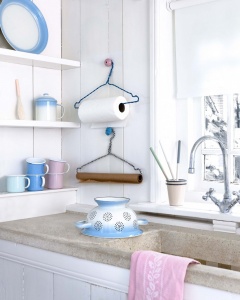
Image via: vtwonen
A Heart of Hope Dream Catcher
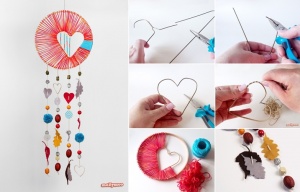
Molly Moo Crafts has shared a wonderful tutorial of making a heart dream catcher and the heart is basically created by using a wire hanger and then wrapped in yarn.
A Burlap Wreath
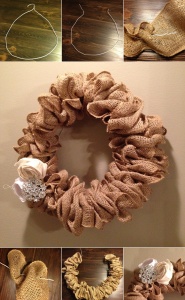
Tara Boettger the girl behind Just Call Me Homegirl came up with a wonderfully amazing burlap wreath that she has created from a frame of a wire hanger. To make this wreath you have to unwind a wire hanger and pass the wire through a ribbon of burlap while adding ruffles at the same time. In the end close the loop of the wire and add an embellishments of silk flowers and a jewel pin.
A Sunburst Mirror
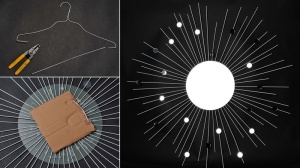
Fresno Beehive has shared another wonderful project to create a sunburst mirror using multiple wire hangers, mini mirrors and a central mirror.
A Cutting Board Gallery Wall
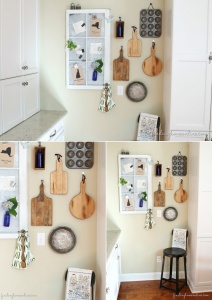
Gallery walls are really in these days and Laura at Finding Home Farms has proved that in order to create a cool and inspiring gallery wall you don’t really need fancy and expensive frames. The way she has made use of these cutting boards into a gallery wall is truly commendable.
Cutting Board and Fabric Utensil Holders
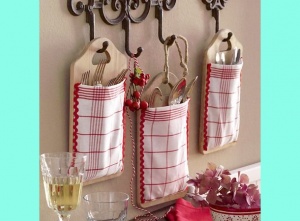
Image via: Lecker
A Cool Hand Painted Porch Sign
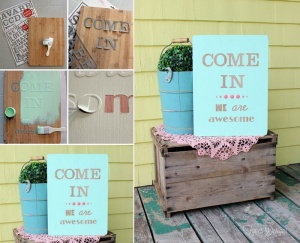
Virginia at Fynes Designs made use of an old chopping board and turned it into a beautiful stenciled hand painted sign in cool mason jar blue color.
Cheese Serving Trays with Pedestals
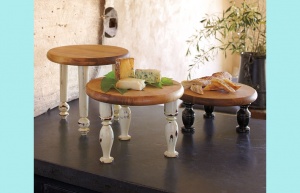
Image via: Ms Smartie Pants
A Wall Art That Says ‘EAT’
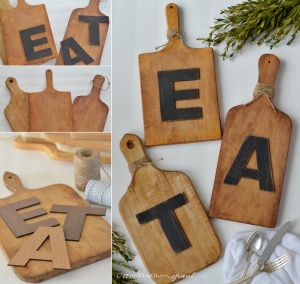
Jamie at Anderson and Grant created a beauteous wall art with three cutting boards, painted wooden letters and twine. You can also give this project a shot and display this wall art in your kitchen.
A Pedestal for a Vase
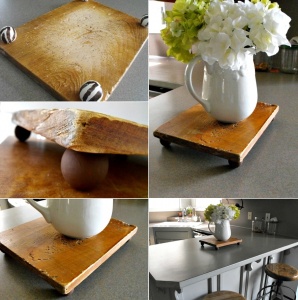
Image via: Susie Harris Blog
A Serving Tray with a Sleeve Made of An Old Sweater
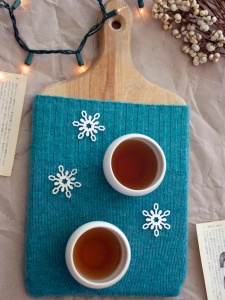
Image via: HGTV
A Tablet Holder
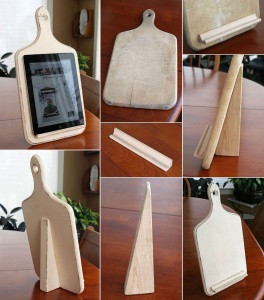
How many times you have wanted to follow a recipe from your tablet and you had to make it stand somewhere with a great difficulty? If this is a daily business for you then this tablet holder made by Jane at Mamie Jane’s Blog is definitely the ultimate solution. Made from an old cutting board, a scrabble tile holder and a kids’ building block this one is the star of our today’s roundup.
A Kitchen Apron Organizer
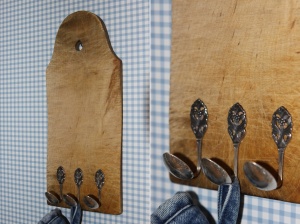
Image via: Sjarmerende Gjenbruk
A Message Board
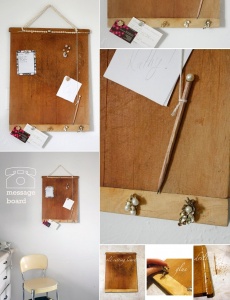
Disney of Ruffles and Stuff recycled her old chopping board into a wonderful message board after combining it with a pearl string and some bling elements too.
A Decoupaged Cutting Board with a Whimsical Mushroom Print
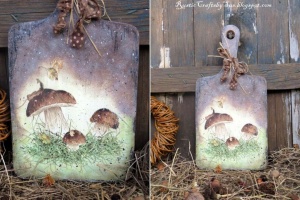
Image via: Rustic Crafts by Sue at Etsy
A Chalkboard Kitchen Sign
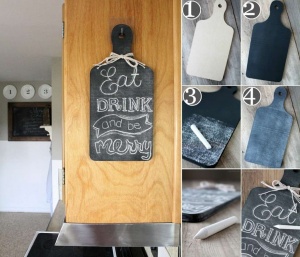
Image via: Love Grows Wild
A Planter Shelf
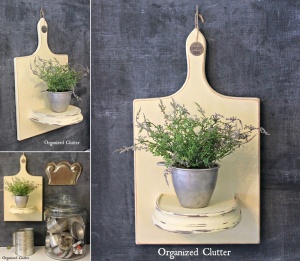
Image via: Organized Clutter
A Kitchen Clipboard
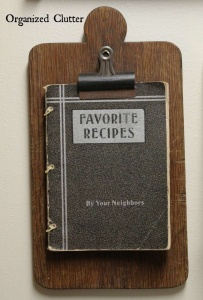
Image via: Organized Clutter
A Shabby Chic Zinc Vase Holder
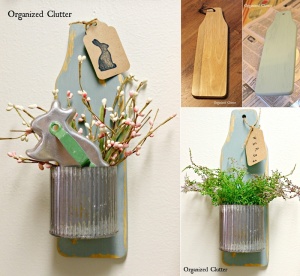
Image via: Organized Clutter
A Kitchen Sign
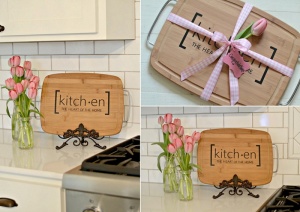
Image via: Silhouette America
A Serving Tray Made with a Cutting Board and Drawer Pulls
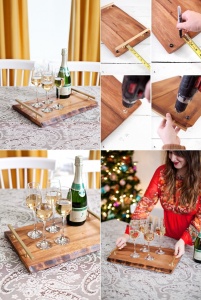
A Beautiful Mess blog has shared a great way to make a rustic yet a chic tray with an old cutting board and some cool drawer pulls.
A Garden Decor Dragonfly
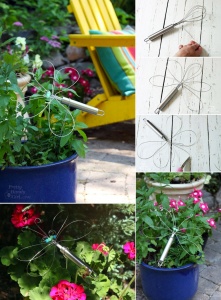
Brittany the creative girl behind Pretty Handy Girl wore her creativity cap and came up with a fabulous idea. She has created a wonderful dragonfly by bending a whisk and combined it with skewers to give it the final form. She made the eyes of the dragonfly with beads. You can also give a try to this easy peasy creation.
A Crocheted Birdcage with a Birdie Inside
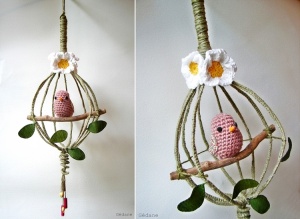
Gedane Over Blog has shared a stunning way to make use of an old whisk and crochet over it to create a birdcage as we all know a whisk has a close resemblance to a birdcage. How cute such a crocheted whisk birdcage will look inside a baby’s nursery or a kids’ room.
Whisk and Wine Bottle Luminaries
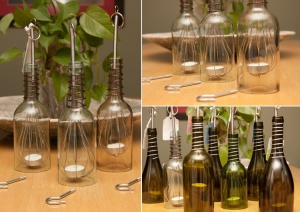
Etsy Shop Micha Baby has created these stunningly beautiful wine bottle and whisk luminaries. They can be used for bringing a charismatic look to a party or wedding decor.
Yarn Organizers
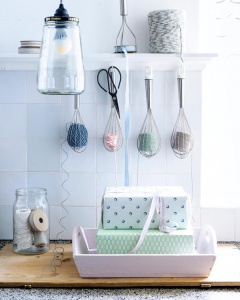
vtwonen has shared a great way to store your yarn. During winter days we are sure all the people who are fond of crocheting must be having a basket full of tangled yarn. So, here is a great way to keep all the yarn organized.
Candle Holders
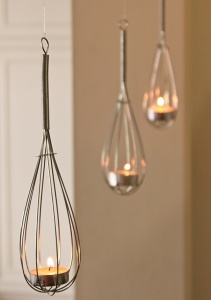
Minha Casa has shared a way to make these easy yet elegant candle holders from whisks. Truly clever and just beautiful!
Beauteous Whisk Flowers Made with Fabric
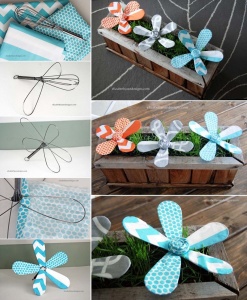
Image via: Elizabeth Joan Designs
A Peacock Garden Art
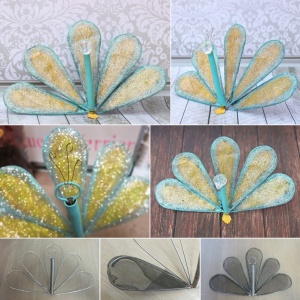
Morena at Morena’s Corner created this jaw-dropping and truly incredible peacock with an old whisk, net and glittery paint. Two thumbs up Morena!
Christmas Tree Ornaments
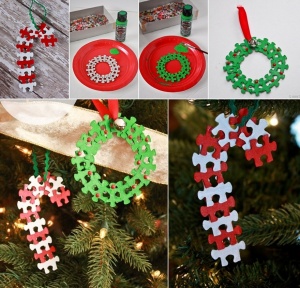
Cheryl at That’s What Che Said created these cool candy cane and wreath ornaments by painting and gluing together pieces of a puzzle and then added ribbon loops. Moreover, for the berries of the wreath she used red puffy paint.
Puzzle Pieces Hearts
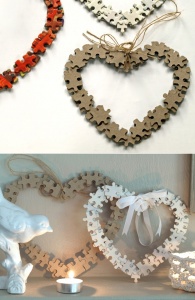
Freshly Found Blog has shared yet another lovely way to recycle old puzzle pieces. You can glue them together in the form of a heart that you can either hang or put on a shelf or mantel. For creating these hearts you can also use the backside of the puzzle pieces or simply paint them in one color such as the white one.
A Name Nursery Wall Art
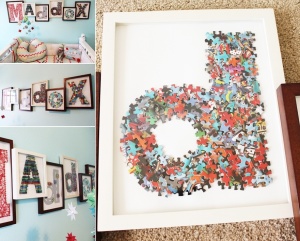
Dina at Honey and Fitz has shared a wonderful name nursery wall art created by a mom named Erin who used different materials for her son’s full name wall decor. For the letter ‘d’ appearing in the name Maddox she utilized pieces of an old puzzle. That sounds so interesting!
Decoupaged Puzzle Pieces Garland Ornaments
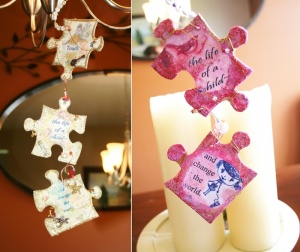
Unusual Girl Studios Blog has shared a wonderful way to decoupage puzzle pieces with your favorite print or quotes and then glue the edges with glitter. She turned the decoupaged puzzle pieces into garland like ornaments with wire and beads.
A Fall Tree
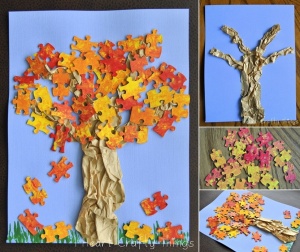
Rachel at I Heart Crafty Things created this cool fall tree. For the trunk she used a brown paper bag. For the leaves of the tree she painted puzzle pieces with acrylic paints in red, orange and yellow in a marble effect. The result is so lovely and beautiful.
A Scattered Rainbow Puzzle Nursery Wall Art
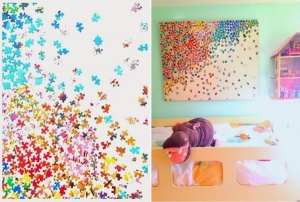
Image via: mommo design
A Side Table
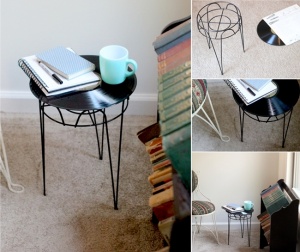
April Starr of The Flourishing Abode came up with an amazing idea. She combined an old vinyl record with a metal planter stand with a hot glue gun and voila! The incredible result is in front of you.
Butterfly Wall Art
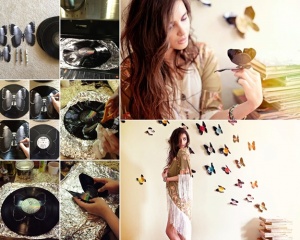
THREADsence Blog has shared a stunningly creative wall art idea. You can create some really amazing butterflies for your wall by heating and cutting vinyl records.
Magazine Racks
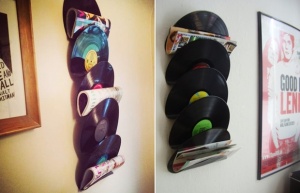
Image via: Mary’s Making , Cheap Crafting
Retro Floor and Table Lamps
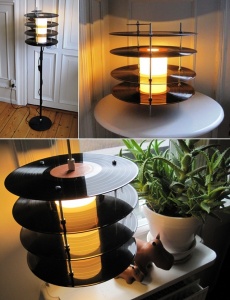
Image via: Genanvendt
A Wine Bottle Rack
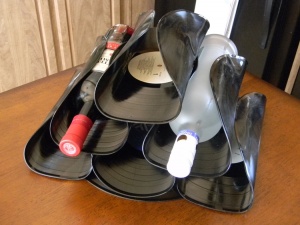
Image via: Lilleyhill Creations at Etsy
Chic Candle Holders
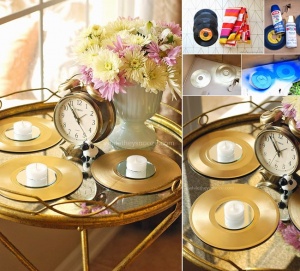
Sarah at While They Snooze created these lovely candle holders by spraying vinyl records with gold paint and then glued mirrors in the center of each record.
A Vinyl Record Chandelier
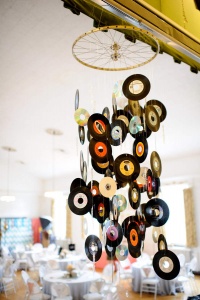
HGTV Blog has shared a snapshot of a music themed wedding and a vinyl record chandelier steals the show out of all the decor.
A Cupcake/Dessert Stand
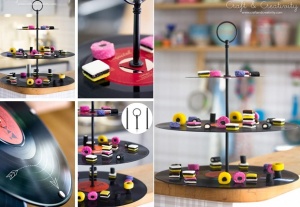
Image via: Craft and Creativity
A Broken Record Ombre Wall Art
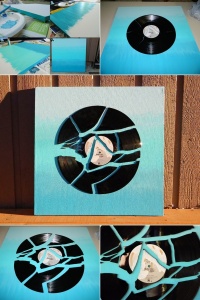
Have you got a broken vinyl record? Well, perfect! Sasha of Tattooed Martha has a wonderful idea to create an ombre wall art from a broken record. Simply paint a canvas with ombre shades of any color. Then take a broken vinyl record or break an unbroken with a hammer to have some fun and glue it to the canvas as shown.
Mandala Record Bowls
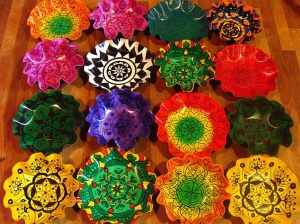
Image via: Marissa Christensen at flickr
A Vinyl Record CD Mosaic Wall Clock
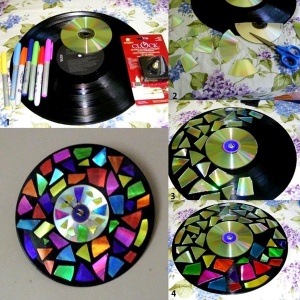
Useful DIY has shared a wonderful way of making a colored mosaic of a CD over a vinyl record and then turning it into a wonderful wall clock with a clock kit.
A Handmade Vinyl Record Book
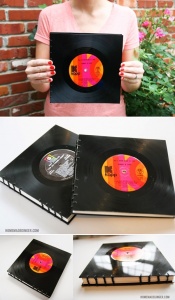
Megan at Homemade Ginger created this wonderful guest book from a vinyl record for her friend’s wedding.
Garden Decor Pinwheels
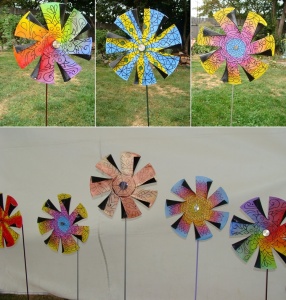
Eye Pop Art has shared these wonderful painted vinyl pinwheels. You can also paint vinyl records with acrylic paints in different patterns and then craft pinwheels with them.
Vinyl Record Coat Racks
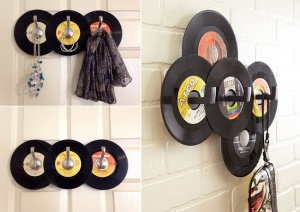
Image via: Music As Art By Sarah via Etsy , Better Homes and Gardens
A Vinyl Record Coffee Table
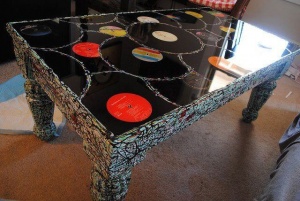
Image via: Sheila Sponties Designer
A Mirror Frame
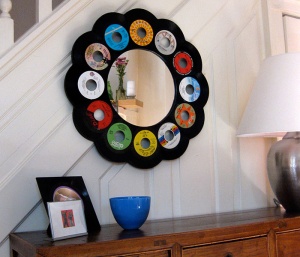
Image via: Vinylux
A Super Cute Wine Cork Reindeer
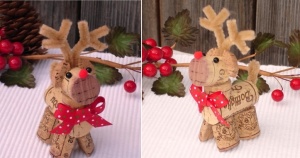
The feel of Christmas is already in the air and here is a cute idea by Moms Menu Planner where old wine corks are converted into a reindeer.
An Ombre Heart Art
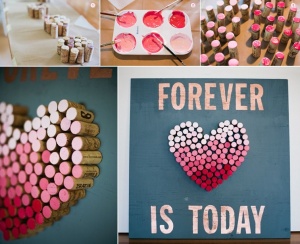
Green Wedding Shoes blog has shared an ombre wine cork heart that was exclusively crafted for a couple’s wedding who are wine lovers. Such a lovely artwork it is!
Wine Cork Candle Holders
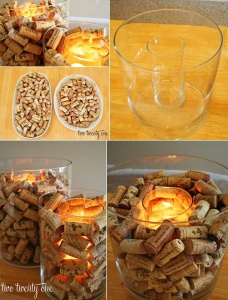
Chelsea @ Two Twenty One recycled wine corks into wonderful candle holders. These can make absolutely stunning centerpieces for a party or wedding. The golden light of flames looks just fabulous with the woody texture of corks.
A Wine Cork Chandelier
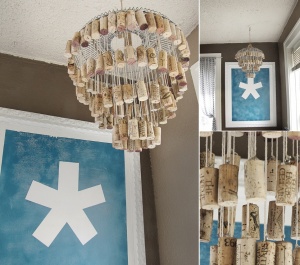
Image via: Mox and Fodder
A Cork Topped Coffee Table
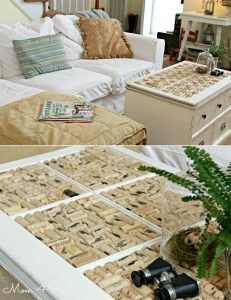
Image via : Mom 4 Real
Wine Cork Vases
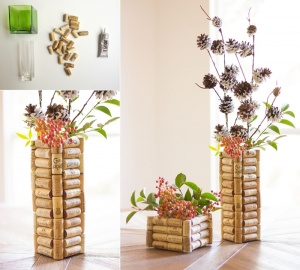
Haeley at Design Improvised created these wonderful wine cork covered vases. She used a heavy duty adhesive over rectangular and squares vases to glue the corks.
Clever Wine Cork Heel Stays
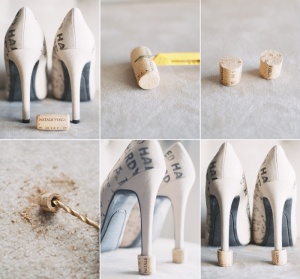
Image via: Climer Photography
A Wine Cork Trivet
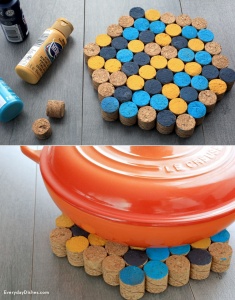
Everyday Dishes has shared a way to make a trivet for your pots and pans by hot gluing together painted slices of wine corks.
Wine Cork Herb Markers
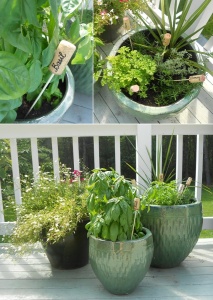
Lisa at Shine Your Light Blog has shared a cool way to make herb garden markers. Simply write the names of the herbs on wine corks with a sharpie marker and then poke in a wooden skewer in each cork and voila!
A Wine Cork Christmas Wreath
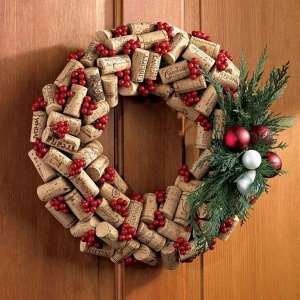
Image via: Net New England
An Ombre Necklace Rack
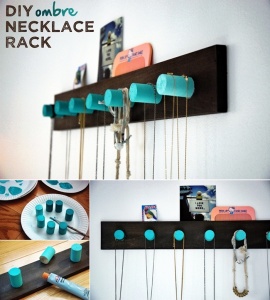
Image via: Well It’s Okay
A Bulletin Board
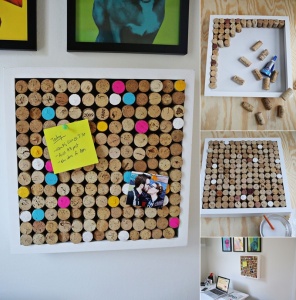
Image via: A Beautiful Mess
Wine Cork Backsplashes
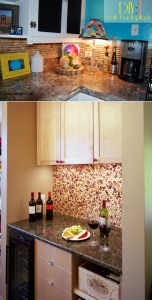
Image via: Jader Bomb , houzz
Wine Cork Napkin Rings
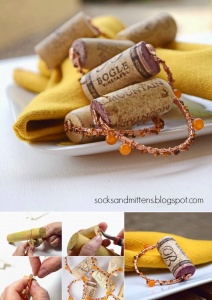
Socks and Mittens has shared a cool way to make napkin rings with wire, corks and beads. Just amazing!
Wine Cork Key Rings
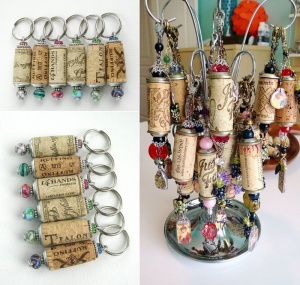
Image via: Liz King Designs Etsy
A Charming Necklace
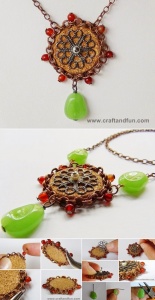
Image via: Craft and Fun
Succulent Magnetic Planters
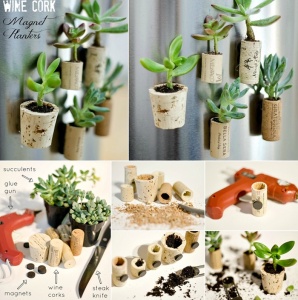
Image via: It All Started with Paint
A Wine Cork Christmas Tree
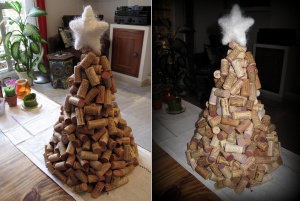
Image via: Craftster
Adorable Faux Birdhouses
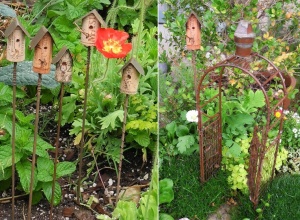
Tina Sitty Bitty Garden Etsy Shop has created these super cute birdhouses from wine corks that look just so perfect in this garden.
Lovely Knitted Wine Cork People
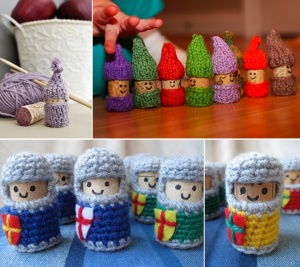
Image via: Crowd Knitting , Craftsanity , Lucy Ravenscar
Old Pillowcase Garment Bags for The Closet
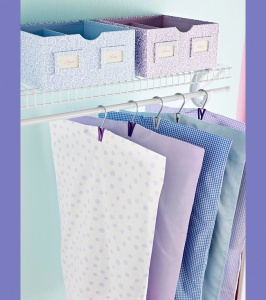
Better Homes and Gardens has shown how you can make slits in old pillow cases and turn them into garment bags for those clothes that are not frequently used and thus have a chance to catch dirt. You can also use these garment bags for storing bedspreads and other linens.
A Pillowcase Tote

Image via: Country Living , Nancy Caudill – Ortiz via Pinterest
A Clothes Hamper
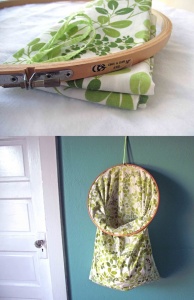
Hello ReFabulous Blog has shared a very easy way to make a clothes hamper. All you need to do is to take a pillow case and fix it between a large embroidery hoop and it is ready to be hung as a clothes hamper. Such a simple yet a clever idea it is!
A Pillowcase Baby Dress

Steph at Smoking Lily found a set of vintage pillowcases at a thrift store and then she wore her creativity cap and turned the pillowcases into a cute summer dress. You can also give it a try if you have a little girl at home who would love to have a new home sewn dress.
A Cafe Style Bathroom Curtain
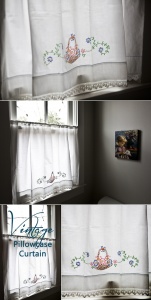
Anita at Cedar Hill Farmhouse wanted to dress the window of her bathroom so she went for creating a cafe style curtain from a beauteous vintage pillowcase that has a lovely embroidery and a crochet hem.
A Pillowcase Skirt
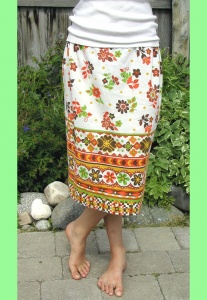
Bella Dia Blog has another great idea for recycling an old pillowcase. Simply turn it into a skirt by making some alterations.
A Stunning Peacock Wall Art
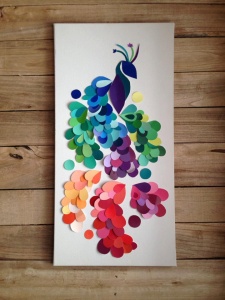
South Magnolia Market’s Etsy Shop has created this jaw-dropping and magnificently beautiful peacock wall art from paint chips.
A Butterfly Wall Art
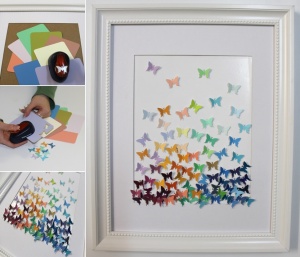
Bright Star Kids has shared an easy-peasy artwork where you just have to punch butterflies out of paint chips and then glue them to a canvas with a frame.
An Elephant Mosaic
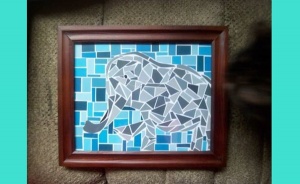
Little Girl a Contributor at Craftster made this creative elephant mosaic for her BFF with paint chips. Really a genius use of paint chips it is!
Colorful and Cool Bookmarks
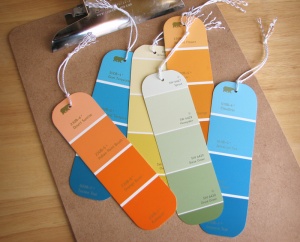
How About Orange Blog has shared a cool idea for book lovers. Simply turn your old paint chips into bookmarks like these with glue and ribbons.
A Sunset Scene
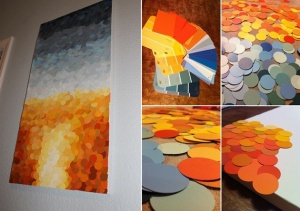
Simply Real Style has shown how you can make a scene of sunset using paint chips in shades of blue, orange and yellow. This one deserves a wow!
Stylish Ombre Earrings
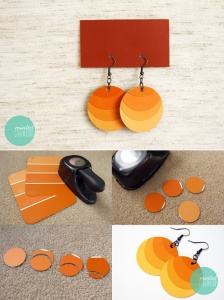
Aki at Minted Strawberry has shown a great way to make your own ombre earrings using paint chips. Now we are sure, all of your dresses are going to have matching ombre earrings.
An Ombre Chandelier
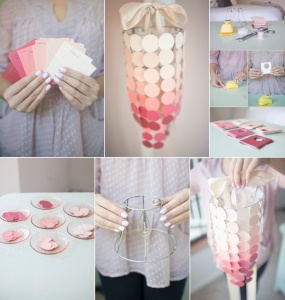
Image via: Hey Gorgeous Blog
A Christmas Tree
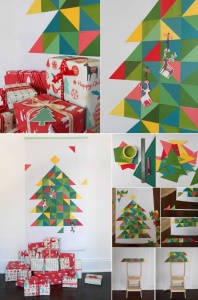
Lisa at We Are Scout has shared a great holiday decor idea. She has created a Christmas tree in geometric design by cutting paint chips.
An Easter Garland
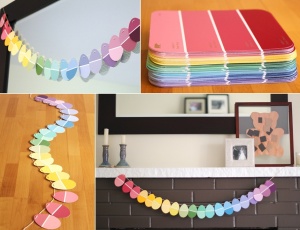
Image via: Modern Parents Messy Kids
An IKEA Clock Makeover
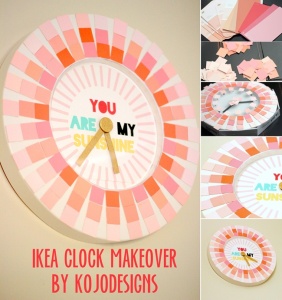
Image via: Kojo Designs
A Bark and Paint Chip Tree
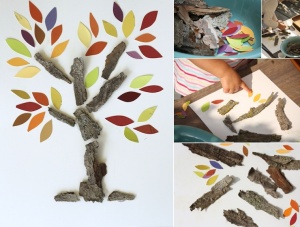
Image via: Happy Hooligans
Paint Chip Name Letters
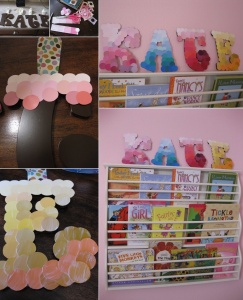
Andrea at Life Love Larson was redecorating her daughter’s room and she gave a makeover to old name letters with paint chips that look just so lively and cute.
An Anthropology Inspired Necklace
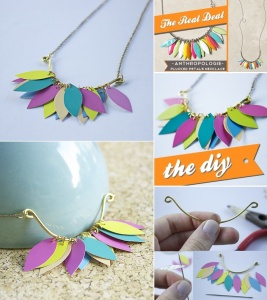
Image via: Quiet Lion Creations
Bike Wheel Decor
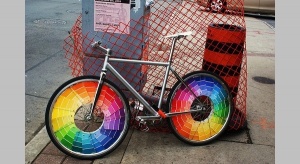
Image via: Broke and Healthy
Paint Chip Flowers
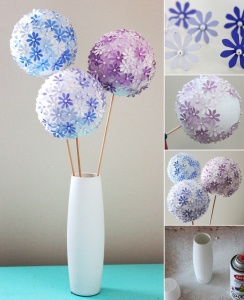
Image via: hgtv
A Coffee Table Makeover
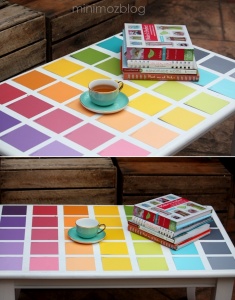
Danielle at Minimoz Blog has given a stunning makeover to an old and ugly coffee table. After painting the not so beautiful coffee table white, and using a double tape, she pasted all the paint chips and finally gave a coat of mod podge to the table. The result is in front of you.
Wagon Wheel Chandeliers
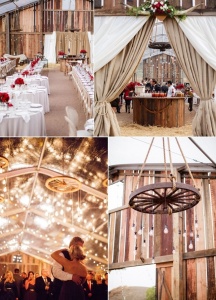
Green Wedding Shoes Blog has shared pictures of a barn wedding where the lighting is done in the form of chandeliers created from bulbs and wagon wheels. A chandelier like this can be hung in your home’s porch too to bring a sudden rustic feel to your outdoor room.
Wagon Wheel Wreaths
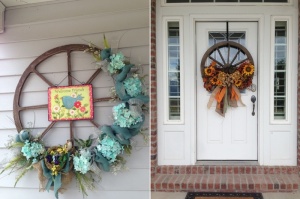
Stephanie Walls and Denise Hamilton have shared their spring and fall season wreaths respectively at Pinterest and both are created by embellishing old wagon wheels. Christmas countdown has already begun and you can steal the same idea for making this year’s Christmas wreath too. Just add red, green and white embellishments to a wagon wheel and your wreath will be ready.
Wagon Wheel Outdoor Coffee Tables
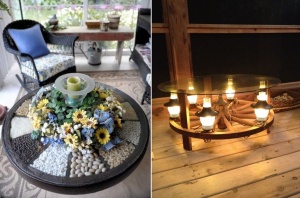
At Home Iillinois and Courtney Simonds via Pinterest have shared pictures of two coffee tables both created from wagon wheels. Both of them are quite unique. The first one has a coastal feel as different kinds of river rocks and pebbles are filled in the pie shaped sectors of the wagon wheel. The second one is basically a wagon wheel chandelier turned coffee table. Both deserve two thumbs up!
A Wagon Wheel Garden Accent
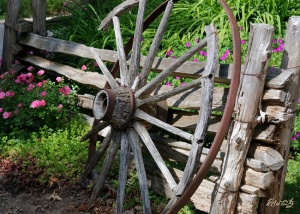
Image via: Sandra Kopytowski at Pinterest
A Wagon Wheel Herb Garden
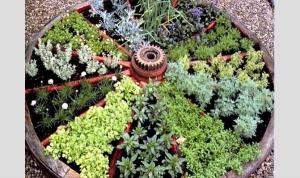
Two Men and A Little Farm has shared a photo of a herb garden that is made using a wagon wheel as the edging of the garden beds.
A Planter Box Wagon Wheel
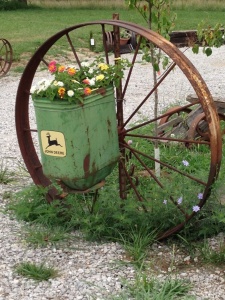
Letha Wynia via Pinterest has shared a beautiful garden decor where a planter box is fixed on a wagon wheel.
A Coastal River Rock Covered Planter
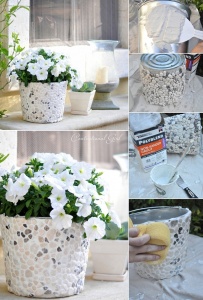
Kate the DIYer behind Centsational Girl crafted this bucket covered with river rocks with the help of mortar, mesh river rock tiles and grout and the result came out in the form of a beautiful coastal inspired planter. This is a great way to recycle all the empty paint cans you have and decorate your home’s outdoor with a coastal feel.
An Ice Bucket
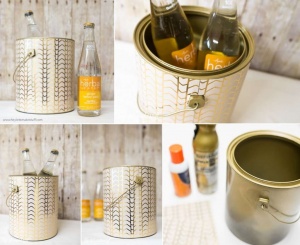
Cori at Hey Let’s Make Stuff crafted this super fabulous ice bucket by painting a paint can in gold color and then covering its outside with a glamorous paper. Then she sprayed the whole bucket with clear coat and voila! It now serves as an ice bucket.
Paint Can Organizers
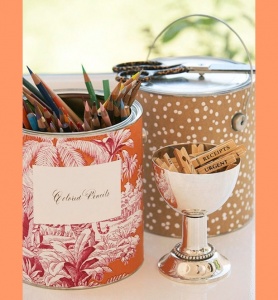
If your home office work desk is usually cluttered and you want to control the ever increasing amount of stuff then this idea by Better Homes and Gardens is worth giving a shot to. Simply cover the paint cans with scrapbook paper, label them and put your stuff inside them.
Paint Can Planters with Drip Painting
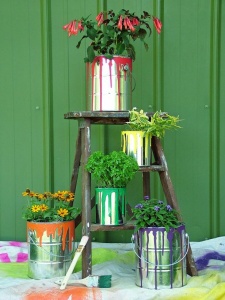
Image via: The Garden Glove
Winter Wonderland Wedding Centerpieces
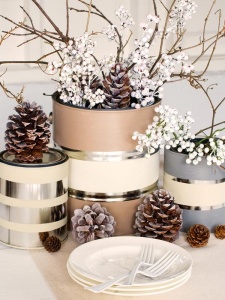
jsa Europe has shown a great way to reuse old paint cans as winter inspired centerpieces for a winter wonderland wedding.
A Can Wrap
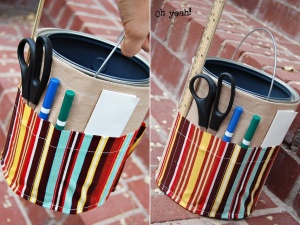
Emily of Toad’s Treasures made a wonderful can wrap for her father who needs to carry pens and other tools to his calligraphy class. This is a wonderful creation that can prove useful for kids too. You can make such can wraps for your kids homework desk.
